How to Use EQ to Make Your Voice Sound Clearer
You don’t need to be an engineer to stop sounding like you recorded in a shoebox
Your mic is decent. Your content is strong. But your voice still sounds a little... off. Maybe it’s muddy. Maybe it’s too harsh. Maybe it just doesn’t have that crisp, clean presence you hear in other creators' content.
This is where EQ saves the day.
You don’t need to know what every knob does or have a degree in frequency wizardry. A few smart EQ tweaks can take your voice from “kind of cloudy” to “clear and confident”—whether you’re podcasting, filming a course, or narrating your next YouTube masterpiece.
What Is EQ?
EQ (short for Equalization) is the process of adjusting different frequency ranges in your audio.
Think of it like seasoning your sound. You don’t want to drown it in low-end gravy or sprinkle too much high-end salt. You want balance. Clean mids, warm lows, and just enough sparkle to make your voice shine.
3 Quick EQ Moves for a Clearer Voice
These work in any DAW—GarageBand, Audacity, Logic, Reaper, or whatever editing software you’re duct-taping your workflow together with, but I'd be remiss if I didn't mention that I literally designed an EQ plug-in that teaches you how to EQ while you're working.
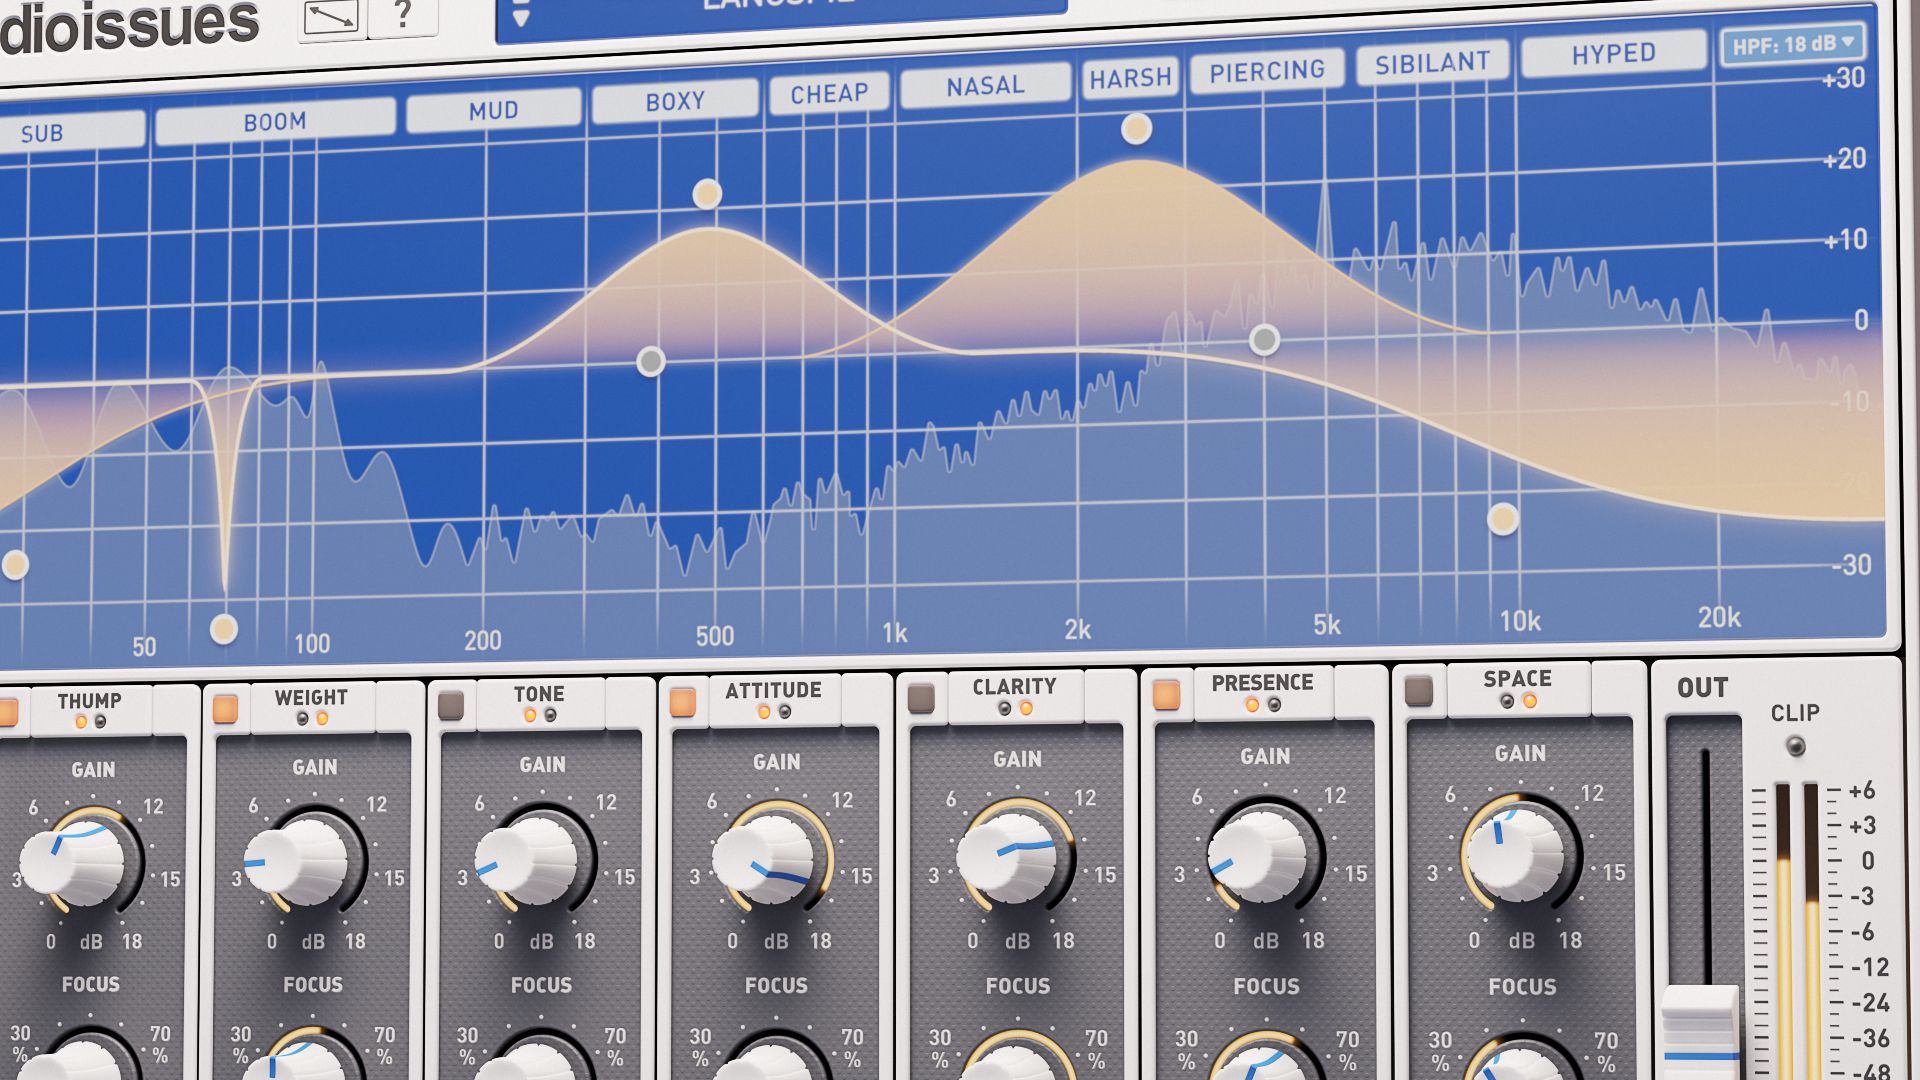
1. Use a High-Pass Filter
This cuts out low-end rumble and unnecessary bass that clutters up your voice.
-
Set it around 100 Hz
-
Clears out thumps, mic bumps, and low-end noise that doesn’t belong
-
Makes your voice less muddy without thinning it out
If your voice sounds like it’s trapped under a blanket, this is where you start.
2. Clean the Muddiness
The mid-lows (200–500 Hz) are where mud lives. This is the “boomy” zone that makes your voice feel cloudy or dull.
-
Sweep through that range to find where things get murky
-
Cut gently—around 2 to 4 dB is usually enough
-
Listen before and after. It should feel clearer, not hollow
This step alone makes a night-and-day difference.
3. Add Some Clarity
If your voice sounds fine but not great, this is where you polish it.
-
Boost around 2–5 kHz
-
This is where intelligibility and presence live
-
A small boost—just +2 or +3 dB—is all you need
Be careful not to overdo it. Too much here and you’ll sound like a dentist’s drill.
Mistakes to Avoid
-
Boosting everything. You’re not building a skyscraper. Subtle is better.
-
Trying to EQ your way out of a bad room. If your recording space sucks, fix that first.
-
Over-processing. If your EQ curve looks like a rollercoaster, you’ve gone too far.
The Fast-Track Option
Want the results without learning the hard way?
The Audio Issues Speed EQ System gives you a visual, intuitive way to EQ your voice without getting lost in audio theory.
-
Plug-and-play EQ cheatsheets
-
Walkthroughs for every major EQ move
-
Works in any DAW or plugin
-
Designed for creators, podcasters, and musicians who want great sound without turning into audio engineers
No guesswork. No weird graphs. Just better sound, faster.
TL;DR: EQ for Voice in 3 Steps
-
High-pass filter around 100 Hz to clear the rumble
-
Cut boomy and boxy mids between 200–500 Hz
-
Add a light boost around 2–5 kHz for clarity
It’s not magic. It’s just EQ done right.
Want to sound more professional without spending hours tweaking knobs? Download the Easy Audio Starter Kit for simple diagrams, setup tips, and beginner-friendly workflows. Or go deeper with the Audio Issues EQ System and get the polish your content deserves.
About the Author
Björgvin Benediktsson is an audio educator, best-selling author of Step By Step Mixing, and founder of Audio Issues. He’s helped thousands of creators sound more professional from the comfort of their home studios.
 This plug-and-play quick start guide will help: